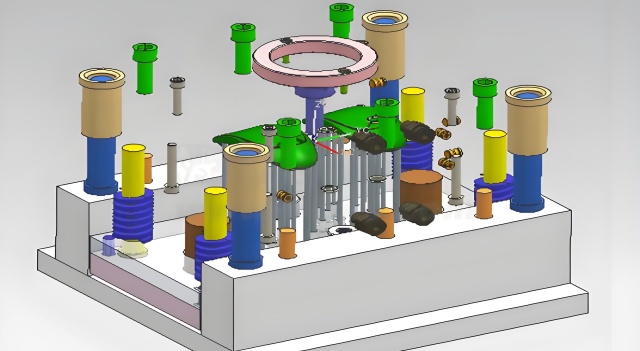
Designing Excellence: Injection Mold Design
Jul 13, 2023
In the realm of plastic manufacturing, the design of an injection mold holds the key to producing high-quality and precise plastic parts. Whether you're a seasoned engineer or new to the field, understanding the intricacies of injection mold design is essential for achieving optimal results.
Step 1: Understand the Requirements.
Before diving into the design process, it's crucial to have a thorough understanding of the requirements and specifications of the desired plastic part. Analyze factors such as part geometry, material properties, dimensional tolerances, and production volume to inform your mold design decisions. Considerations such as draft angles, parting lines, and gating locations should also be taken into account at this stage.
Step 2: Choose the Right Mold Configuration.
Selecting the appropriate mold configuration is the next step in the design process. Common mold configurations include single-cavity molds, multi-cavity molds, family molds, and stack molds. Evaluate factors such as part complexity, production volume, and budget constraints to determine the most suitable mold configuration for your project. Single-cavity molds are ideal for low-volume production or large parts, while multi-cavity molds offer higher production volumes with multiple identical parts produced in each cycle.
Step 3: Design the Mold Core and Cavity.
The core and cavity are the heart of an injection mold, defining the shape and features of the final plastic part. During the design process, pay close attention to details such as draft angles, parting lines, and gating locations to ensure smooth material flow and easy part ejection. Incorporate features such as cooling channels, venting systems, and ejector pins to optimize the injection molding process and prevent defects.
Step 4: Optimize Cooling and Venting.
Proper cooling is essential for maintaining consistent part quality and minimizing cycle times in injection molding. Design an efficient cooling system by strategically placing cooling channels within the mold to ensure optimal heat dissipation and temperature control. Additionally, incorporate venting systems to prevent air pockets and trapped gases from forming inside the mold cavity, reducing the risk of defects such as voids or burns on the molded parts.
Step 5: Consider Material Selection and Shrinkage.
The choice of material for the mold depends on factors such as part complexity, production volume, and expected mold lifespan. Common materials for injection molds include tool steel, aluminum, and various alloys. Account for material shrinkage during the design process and adjust the mold dimensions accordingly to ensure the final parts meet the desired specifications.
Step 6: Validate and Iterate.
Once the mold design is complete, it's essential to validate it through simulation and prototyping to identify and address any potential issues or defects. Utilize advanced CAD software and Moldflow analysis tools to predict the behavior of the mold during the injection molding process and optimize its performance. Iterative testing and refinement may be necessary to fine-tune the mold design and achieve optimal results.
Designing an injection mold requires a combination of technical expertise, creativity, and attention to detail. A well-designed mold not only ensures the quality and consistency of the final product but also contributes to efficiency, cost-effectiveness, and overall manufacturing success.

