A Step by Step: How to Make an Injection Mold
Jul 13, 2023
Injection molding stands as a cornerstone in the realm of manufacturing, facilitating the production of a vast array of plastic products. At the heart of this process lies the injection mold-a meticulously crafted tool that dictates the quality, precision, and efficiency of production. How to make an injection mold?
Step 1: Designing the Mold.
The journey of creating an injection mold begins with meticulous design. Employing advanced CAD software, engineers meticulously craft the blueprint of the mold, considering factors such as part geometry, material properties, and production requirements. Attention is paid to details such as mold cavity, gating system, cooling channels, and ejection mechanism to ensure optimal performance during production.
Step 2: Selecting the Mold Material.
Choosing the right material for the mold is crucial for its durability and performance. Common materials for injection molds include tool steel, aluminum, and various alloys. Factors such as production volume, part complexity, and budget considerations dictate the choice of material. While tool steel molds offer longevity and durability, aluminum molds provide cost-effectiveness and faster turnaround times for prototyping and low-volume production runs.
Step 3: Machining the Mold.
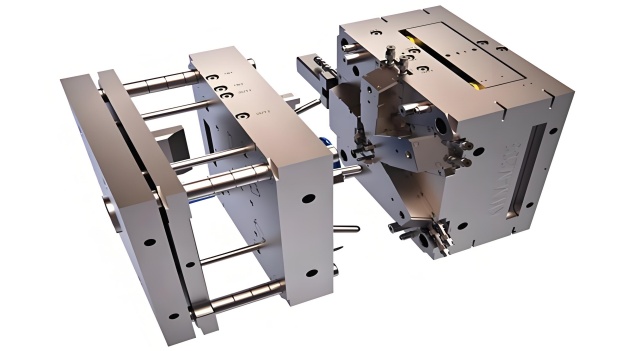
With the design finalized and the material selected, it's time to bring the mold to life through precision machining. Utilizing advanced CNC machining techniques, the mold components are meticulously crafted to match the specifications outlined in the design. The mold typically consists of two halves-the core and cavity-which are machined separately before being assembled to form the complete mold.
Step 4: Adding Features and Details.
During the machining process, additional features such as cooling channels, ejector pins, and venting systems are incorporated into the mold design. Cooling channels help regulate the temperature of the mold during production, ensuring optimal material flow and faster cycle times. Ejector pins aid in ejecting the finished parts from the mold, while venting systems prevent air pockets and trapped gases, minimizing defects in the final product.
Step 5: Polishing and Finishing.
Once the machining is complete, the mold surfaces undergo meticulous polishing and finishing to achieve the desired surface texture and appearance on the final parts. Techniques such as sandblasting, polishing, or chemical etching are employed to ensure a smooth and uniform surface finish. A well-finished mold is essential to prevent defects such as sink marks or surface imperfections on the molded parts.
Step 6: Testing and Validation.
Before putting the mold into production, it undergoes rigorous testing and validation to ensure its performance meets the desired specifications. Test shots are conducted using the actual production material, allowing engineers to fine-tune the mold settings and optimize the injection process. Any issues or defects identified during testing are addressed, and the mold is adjusted accordingly until satisfactory results are achieved.
Making an injection mold is a meticulous and intricate process that requires careful planning, precision, and expertise. By following the steps, manufacturers can create high-quality molds that lay the foundation for efficient and cost-effective production. With the right tools, materials, and attention to detail, crafting an injection mold becomes not just a task, but a testament to the mastery of the manufacturing craft.

